*This post may have affiliate links, which means I may receive commissions if you choose to purchase through links I provide (at no extra cost to you). Thank you for supporting the work I put into this site!
One of the things I have always loved about our house is the closet space! We have lived in houses in the past where storage was seriously lacking. However, that is not the case in this house. I consider that a housing win!
Today though, I want to talk specifically about closets. Not just any closets, KIDS closets. Many years ago before my journey to get organized began. I thought of closets as a small space that we should cram as much crap in as we can and just pray we can shut the door!
Anyone else feel that way?
Well, I am happy to say that is no longer my view on closets. It was one simple quote that helped to change my mindset. Here is what it said…..
“Clutter is simply delayed decisions”
Wow! How true is that statement! How much of the stuff in your closets is put there because you do not want to think about it, or deal with it, at that moment? So what do you do? You stuff it in a closet!
Out of sight, out of mind. Right?
Wrong!
I wanted things to be different. I wanted to use EVERY space in our house to the best of my ability. I was tired of our closets being a hiding space for all of our delayed decisions!
Two of our children both have double closets in their rooms. After we did all of our decluttering I was surprised to find that they had an entire closet that was EMPTY! Crazy how that can happen!
So what did we do with that empty space?
Well…. We actually turned it into a cute and cozy desk space. Its a space that they can sit and do whatever their heart desires. I also wanted a space that would grow with them as they got older, so I tried to keep that in mind when planning things out.
In case you missed it. We actually did something similar with our own closet. We loved it so much that we decided to do the same for our kids. You can find that post HERE.
Both of my kids absolutely LOVE their space. Believe it or not they don’t miss all the toys they never played with and clothes that they never wore.
(Disclaimer: They still have plenty of clothes and toys! They are just not crammed in their closet and we only kept what they truly loved and played with.)
What they got in return was a fun and personalized space that they use almost every single day to write, draw, build, and do homework.
How great is that!
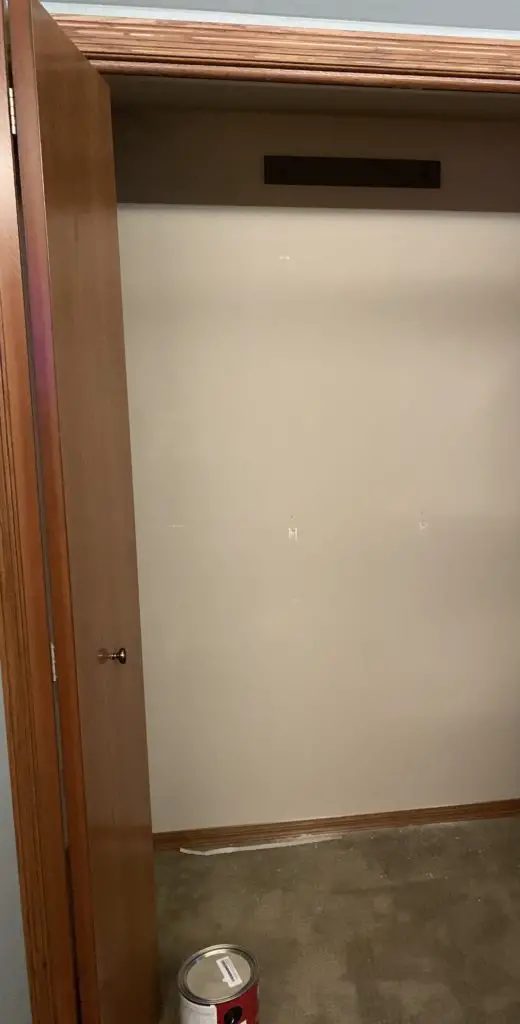
Here is a BEFORE pic in my daughters room….
Here is the AFTER….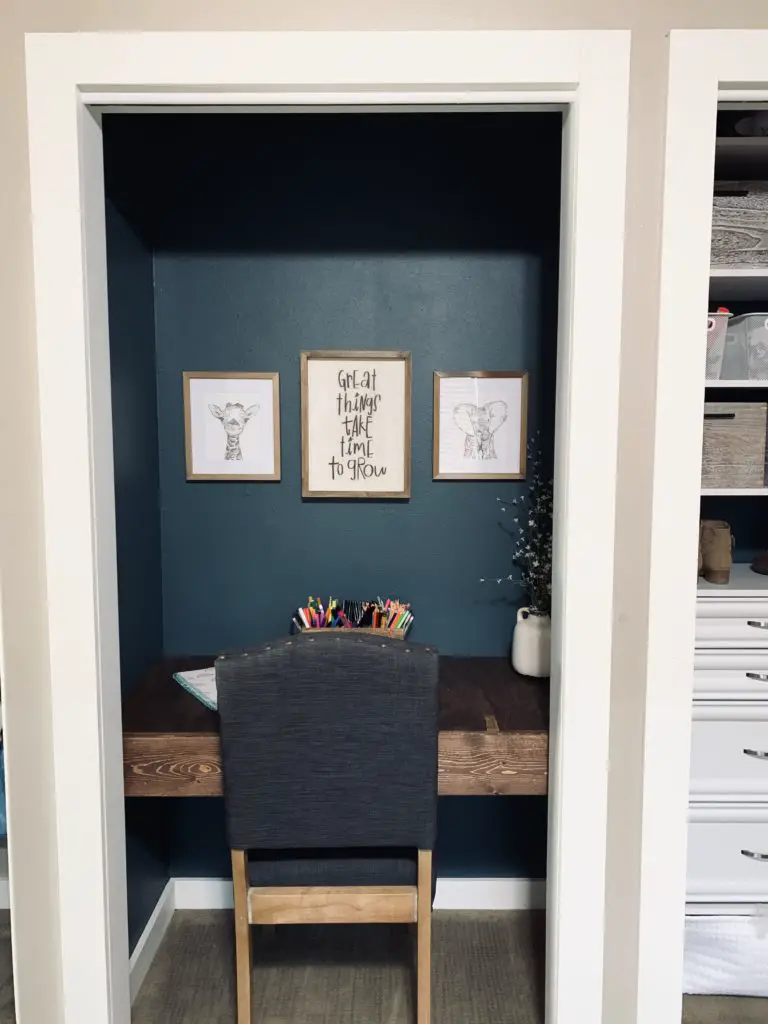
My daughter wanted something girly and simple. She wanted a space where she could color, draw, and do homework. I also added a small thing for crayons markers and pencils. She loves it!
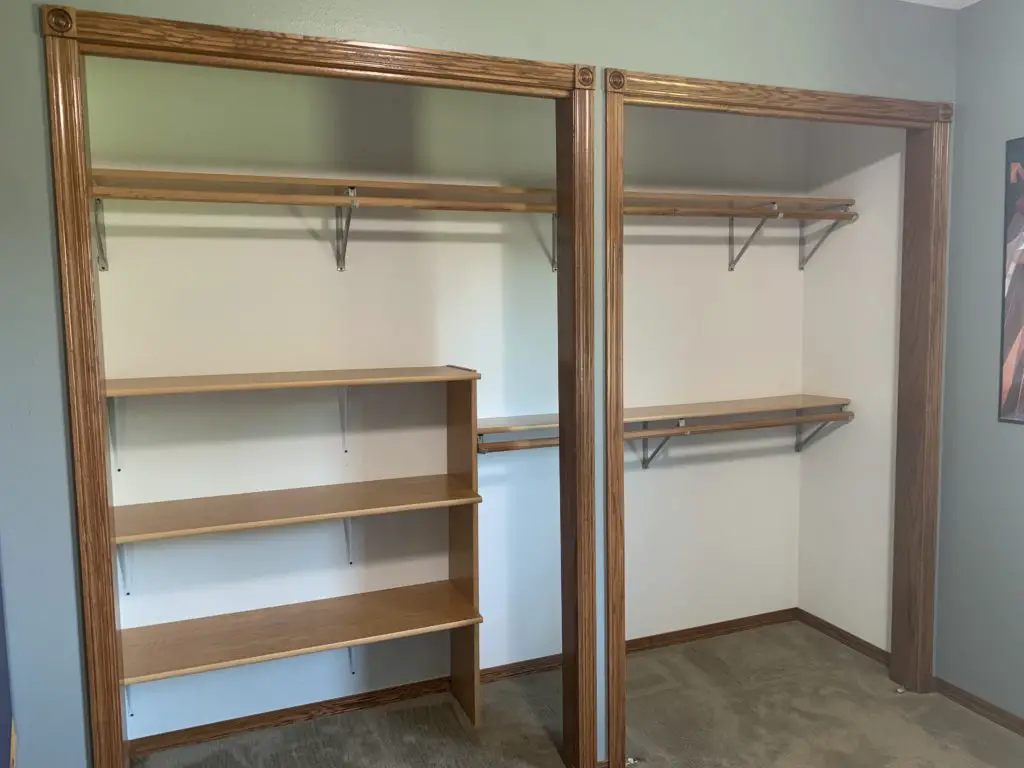
Here is a BEFORE of my sons room….
Here is the AFTER…..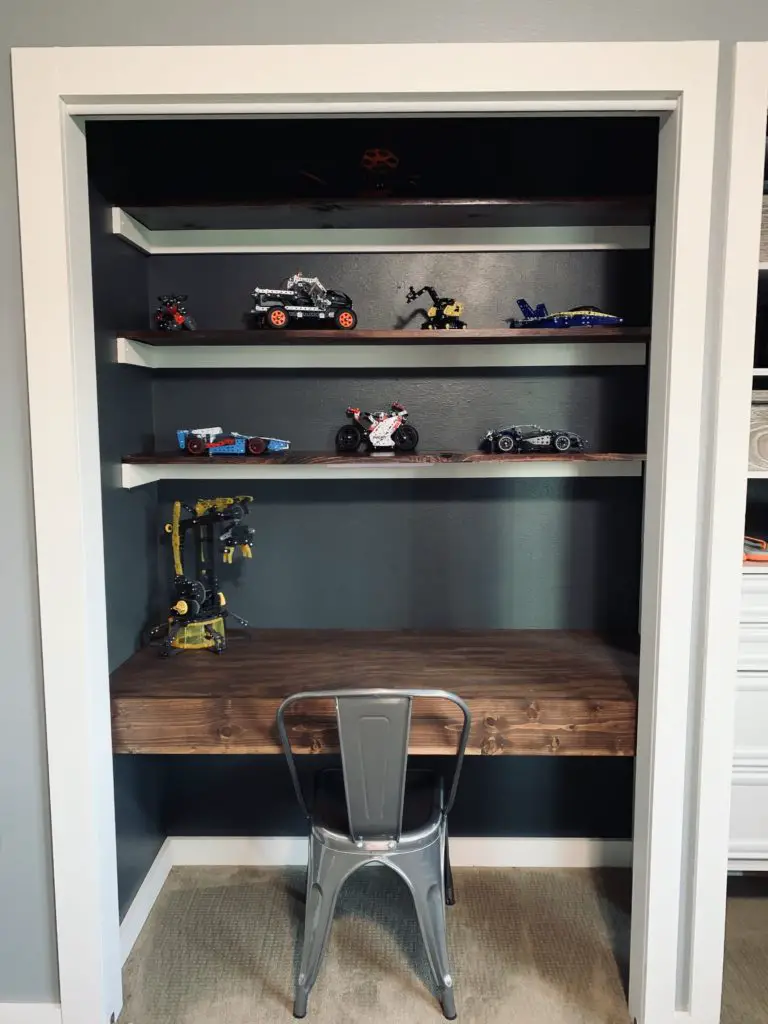
For my sons room the goal was a little different. He wanted a space that he could build and display his things! He also wanted a space that was not on the floor so that if a project was not done it could stay out of the way and not be stepped on.
If you also have a son who likes to build, you might want to check out the other half of my sons room. His LEGOS!
In my next post I plan to show you the other side of their closets. The side that stores all the clothes and shoes. For now though I am going to stick to this side.
Here are the steps we took to get the job done!
Step#1 – Empty the closet, and remove the doors! You do not have to remove the doors. This is just what we chose. Our doors were oak and that is not the look we were going for. Plus, I thought it looked nicer without them!
Step#2 – If needed, paint the closet! I think this step really helps everything stand out, but is not needed. I chose colors that they liked but that also accented the main color of the room.
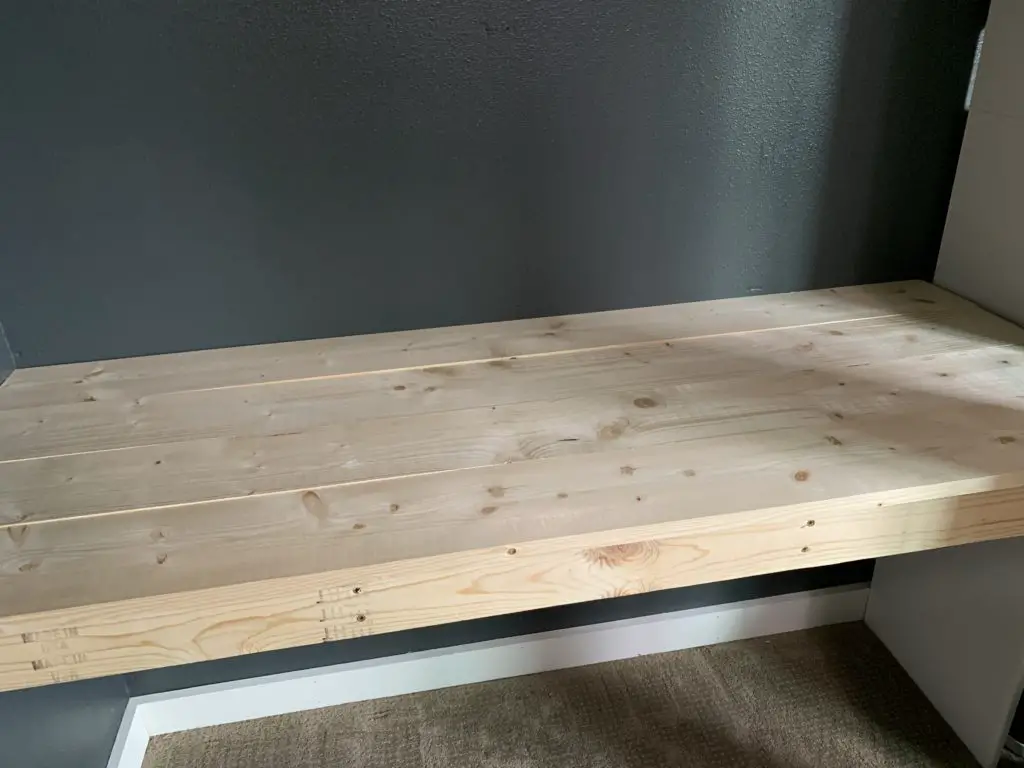
Step#3 – Build the floating desk, or buy one to put inside. We chose to build one because it was cheaper. I also liked the way that it looked.
Here is a pic I took so you can get an idea of how we did it. The frame is really very simple. Just make sure you anchor it to studs in the wall….

Next, all you need to do is choose your top. We used pine boards, which then were painted….
Update : You can also use a single sheet of sanded down plywood, and then paint or stain. My kids liked this better for drawing so we swapped it out. Either one would work though depending on your look and function.
Step#4 – Make a plan on how you would like the rest of the space to look according to the needs and wants of your child.
That’s pretty much it!