*This post may have affiliate links, which means I may receive commissions if you choose to purchase through links I provide (at no extra cost to you). Thank you for supporting the work I put into this site!
I am always up for a good ol’ DIY project. I am also a special fan of those projects that not only make an impact, but are easy on the budget too! We recently did some bedroom updates in my oldest sons room. He wanted something that was football themed with dark colors, and all BOY!
A big part of the update was figuring out how to display all of his football memorabilia. I knew I needed some shelving that was decent sized, but I also did not want to spend a ton of money.
Here is what I came up with…..
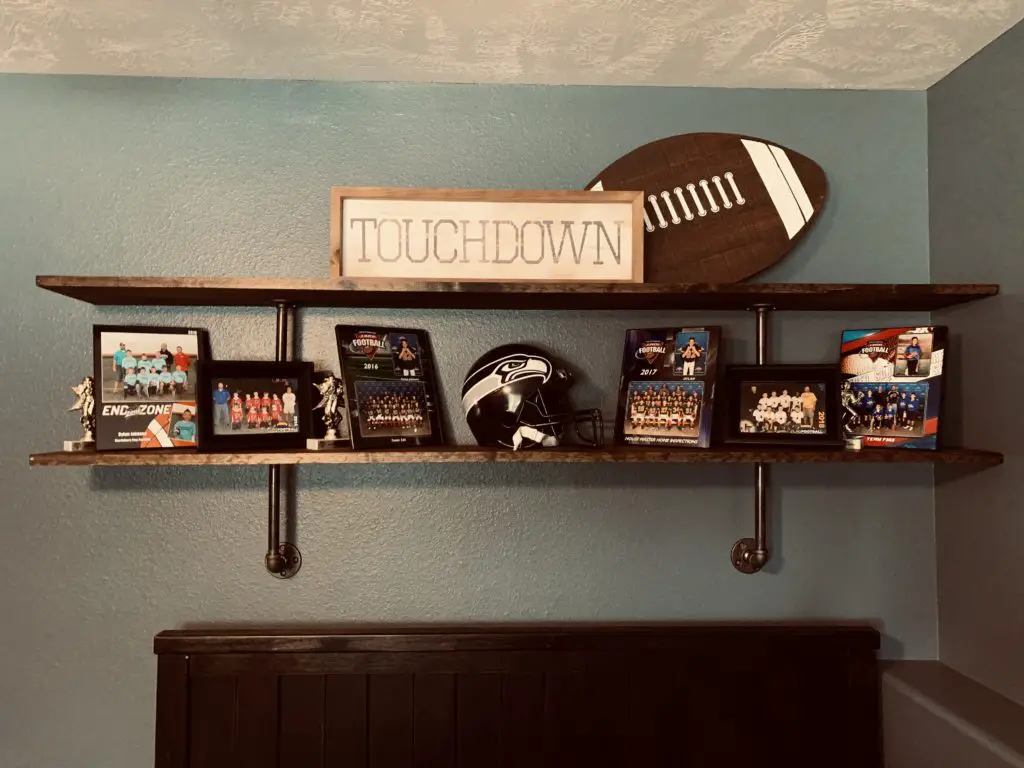
The entire project took me about an hour to complete and was incredibly easy! Here is another view….
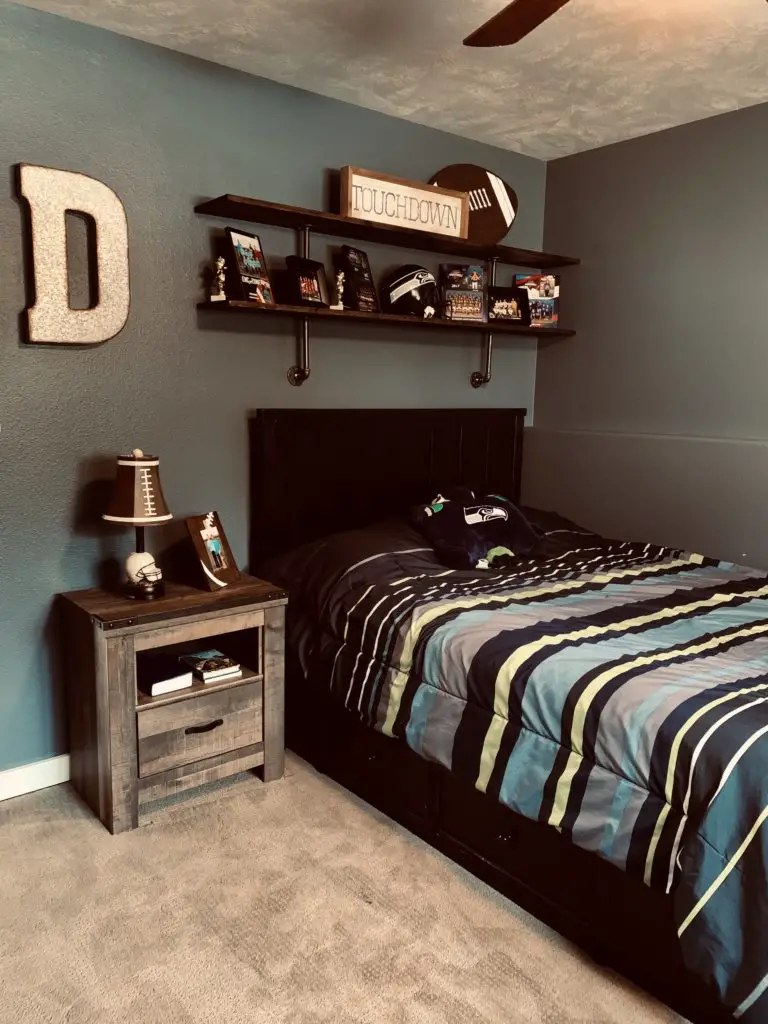
I am in LOVE with how it turned out! He now has a space he can proudly display his team pictures, trophies, and anything else his heart desires.
Here is how I did it…..
SUPPLIES YOU WILL NEED
- SHELVING – Any kind of board will do. This is up to your preference and style. I used 2 1×6 pine boards bought from the Lowes in the lumber section.
- STAIN OR PAINT – You can paint or stain your boards. I used Minwax stain in the dark walnut color.
- BRACKETS – You have a TON of options as far as the brackets are concerned. I will give you more examples below.
Next up, how to get it done…
STEP #1
Measure your space. Decide not only where you will put your shelves but how long and how deep you would like them to be.
STEP #2
Decide what color of paint or stain you would like to use. I personally love the look of stain. But you could always use paint too! If you are unsure, your local hardware store should have lots of samples for you to look at.
STEP #3
Now it is time to decide what you would like to use for brackets. Fortunately you have a TON of options here. If you go to your local hardware stores plumbing section, you will find all of the pieces you need. They are sold separately in a wide variety of shapes and sizes. My caution here is to make sure any pieces you buy are all the same size so they can be fitted to each other.
An easier and slightly cheaper route would be to buy everything together!
Here are some great options….


That pretty much it! Put it all together, and decorate to your liking!
(Oh and make sure you anchor everything in a stud, just in case.)
I hope this has inspired you to build those cute farmhouse shelves you have always wanted. If it has will you help spread the love by liking, sharing, commenting and doing all the things to keep this site going?
Your support is greatly appreciated!
Thanks for stopping
Love these shelves and I’m planning to build them to display legos my kids have built. How long are the boards you used and what’s the spacing between shelves?