*This post may have affiliate links, which means I may receive commissions if you choose to purchase through links I provide (at no extra cost to you). Thank you for supporting the work I put into this site!
If you happen to read my last post, you might know that we recently did some pretty major home projects recently. Part of some of the changes we made during those projects was refinishing some furniture and changing it from oak to white.
I will be honest, I was pretty nervous about painting our furniture. I think my husband may have been even more nervous (although he was not even the one painting). I was nervous mostly because I thought things like “What if I mess up? What if it does not turn out like I expected?” There was absolutely no room in our budget to replace the furniture I was painting, so there was a little bit of pressure to get it right the first time!
Like with a lot of things in life though, sometimes you just need to make that leap, do it anyways, even though you’re petrified of what the outcome may be. So that is what I did, and let me tell you I am so glad that I did not let my fears get the best of me because I absolutely LOVE how it turned out!
There were three major pieces of furniture that I chalk painted. First I will show you the before and afters, and then I will tell you why I chose chalk paint and the steps I took to get it done.
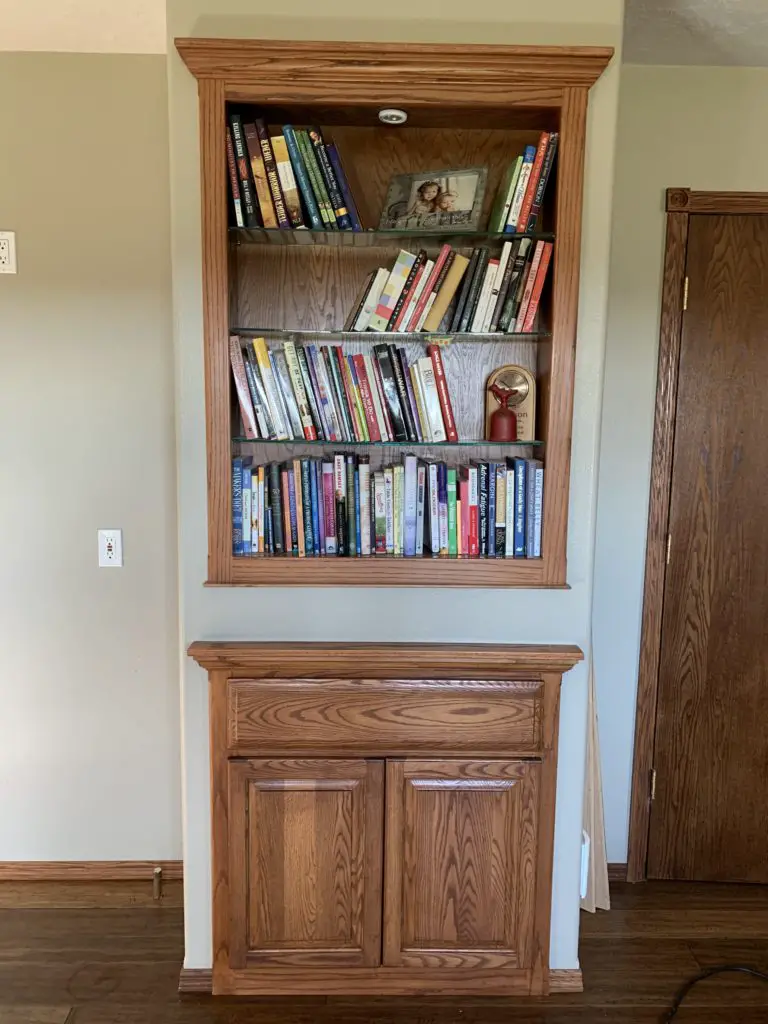
The first piece of furniture I started on was this built in bookcase.
Here is the before….
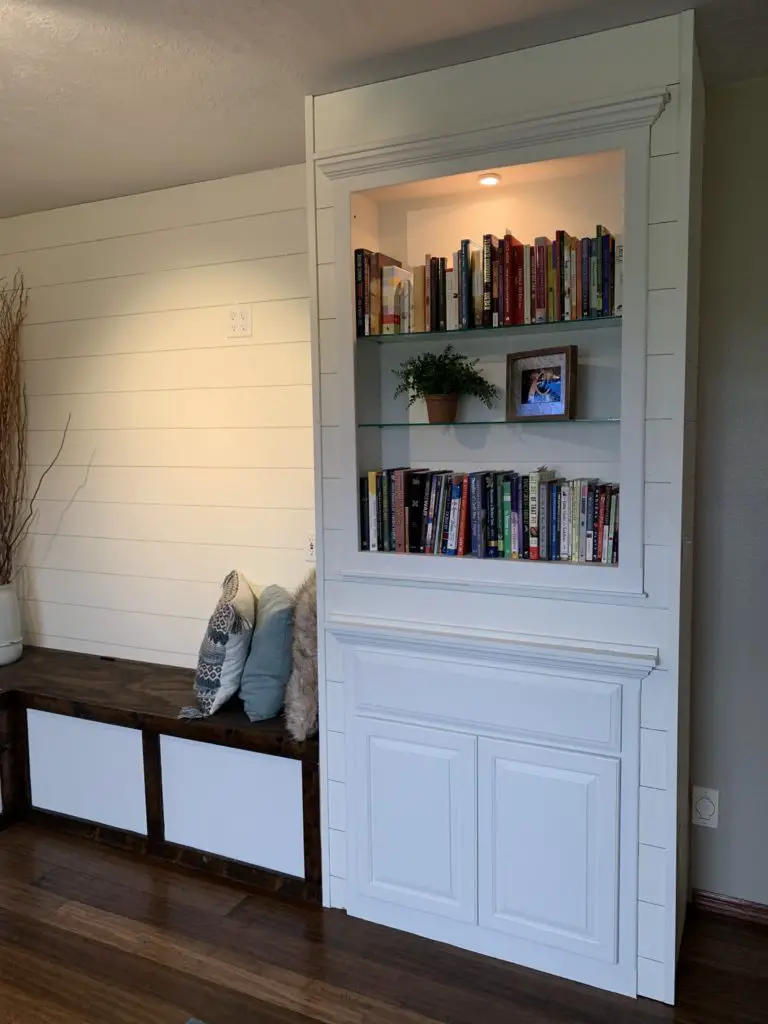
And here is the after…..
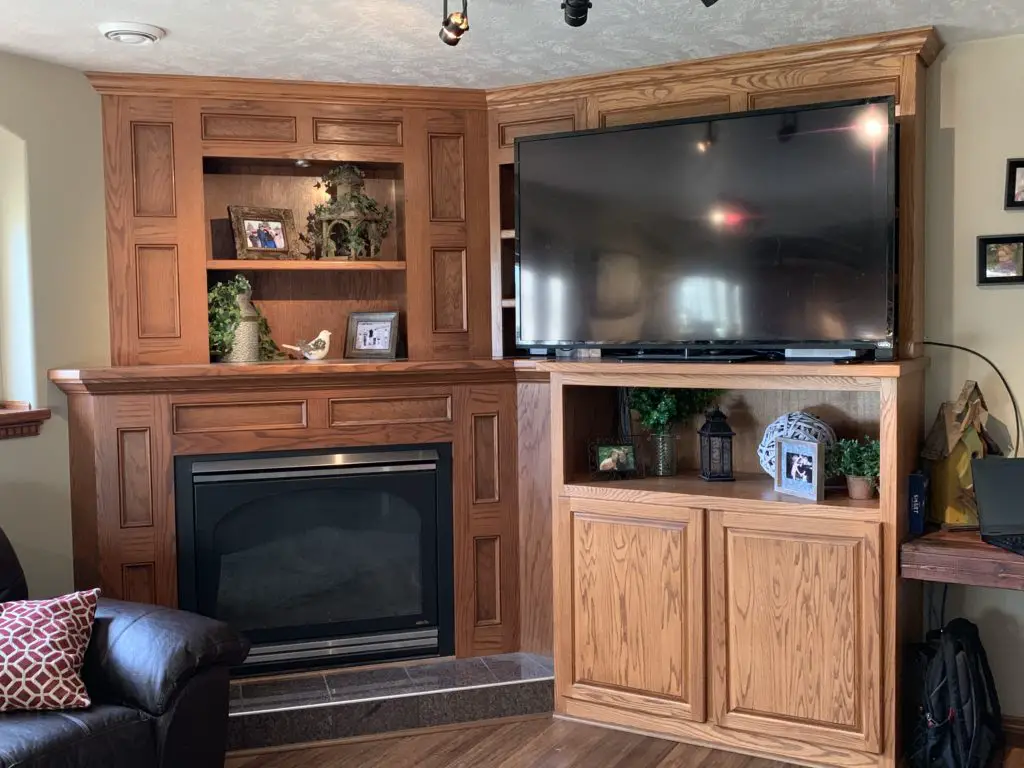
Next I moved onto our fireplace. This one made me a tad more nervous just because it was a bigger and a bit more expensive to replace if I messed up. But instead I prevailed, and I love how it turned out!
Here is the before….
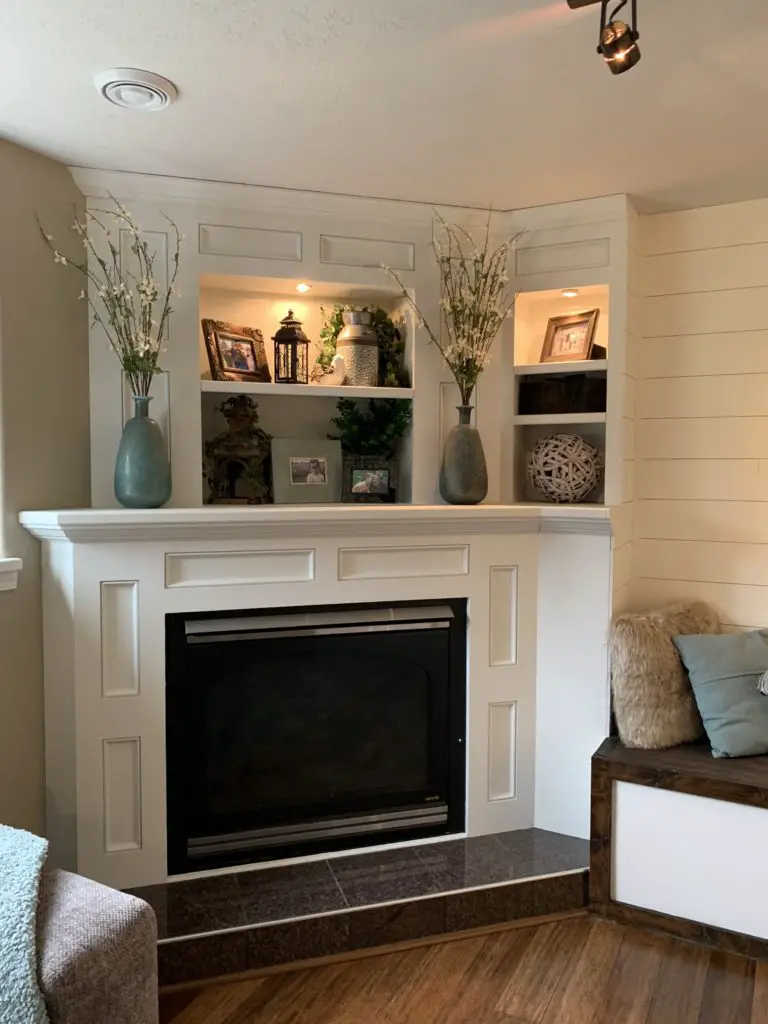
Here is the after….
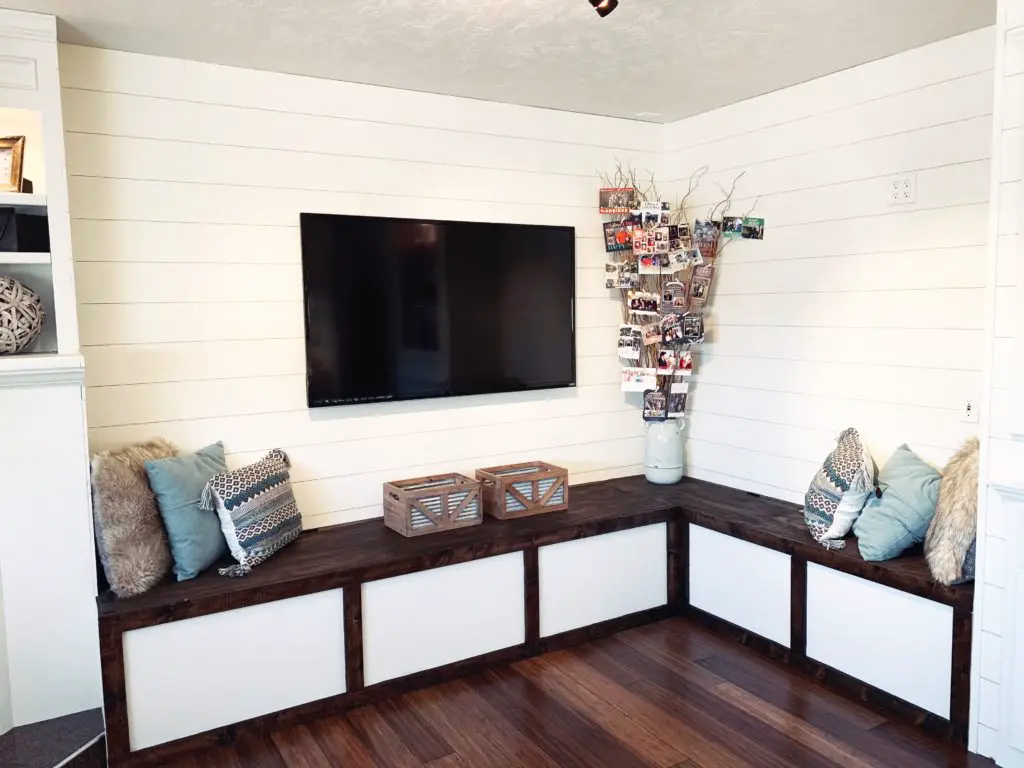
As I noted in my previous post, we also removed the big stand that the TV was on. This really freed up some space and made the whole room feel so much bigger.
Next we added a sitting bench, which added a little more dimension but also added the decorative touch that I was looking for. Stay tuned for the post on how we built that!
I chalk painted the middle squares so that it would tie in with the fireplace and bookshelf!
Here it is…
The last and final chalk painting project, but also the biggest, was a desk on the other side of the room. We homeschool and this desk has been an absolute blessing to me! I love it even more now that it is white!
Here is the before…
Here is the after….
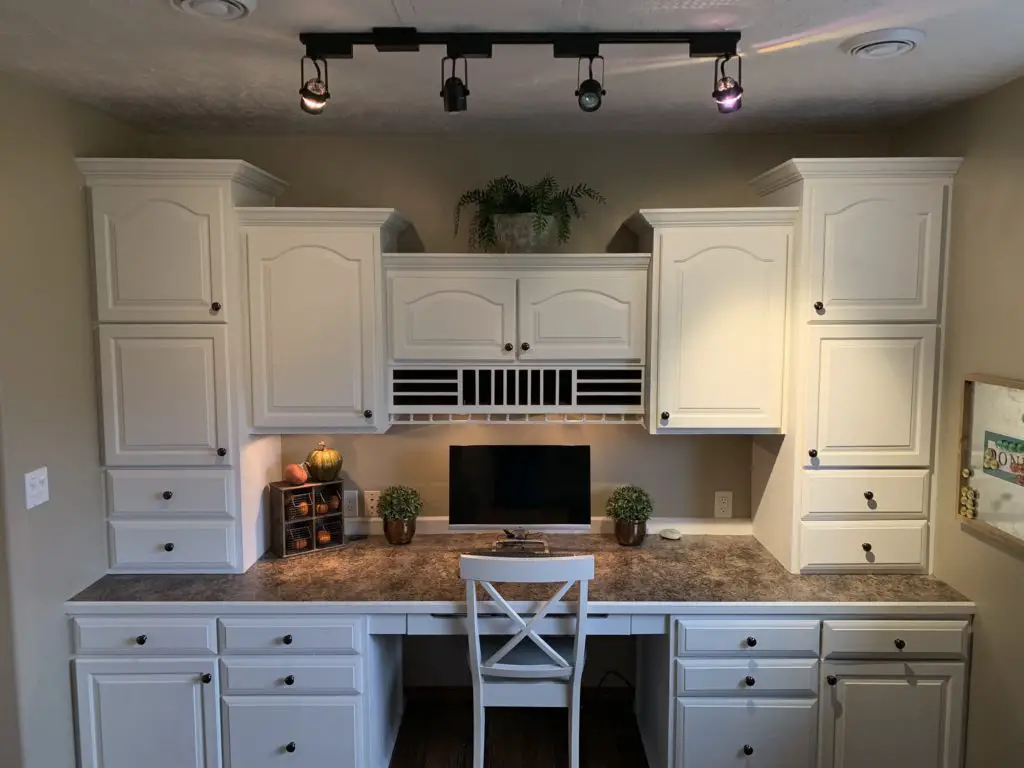
It is so much brighter in this room! Sometimes I am still in shock at how different it looks! I LOVE it!
Why chalk paint you ask?
My #1 reason for using chalk paint is because it requires little to no prep. It generally will stick to any surface and does not require sanding like other paints. This was huge for me because the thought of sanding all of this furniture prior to painting it sounded like torture.
Some other benefits is that it is a low odor paint which makes it nice for painting indoors, it is also water based, so clean up is super easy! On top of that it requires less coats than other paints ( a little goes a LONG way), and is also self leveling which means no streaks! Sounds like liquid gold to me!
So now you might be wondering, what are the steps I took and how did I do it?
The steps are pretty much the same no matter what you are painting, however there are a couple extra steps for the cabinets or anything that you want to paint with a drawer or door.
So lets get started…
Step #1 – Clean off any dirt and grime
I used just plain vinegar and water and that seemed to do a really good job. You can use whatever cleaner suits you best. It is important you clean them first though so that your paint goes on smoothly and sticks nicely.
Step #2 – Remove any hardware
Remove door hinges, knobs, and anythings else you do not want painted. This just makes it easier to paint but also makes it so your hardware does not get ruined in the process.
Step #3 – Patch Holes, Gouges, and Scratches
Look your furniture over for any gouges or deep scratches that need filling. Also if you are changing out your hardware be sure to fill those holes as well. Use wood filler to fill your holes, but make sure it dries white so that it does not potentially bleed through your paint. After that is dry, sand down any rough spots and make sure it is smooth.
Step #4 – Tape Where Needed
Using painters tape, tape of any parts you do not want painted. For me this was the edges where the desk and the wall would meet, around the drawer edges, and the insides of the cabinet.
Step #5 – Time To Paint
There are ton of different brands of chalk paint you can use. In fact, if you are feeling gutsy you can even make your own! Since I am such a huge Chip and Joanne fan and I have complete faith in all of their products. I decided to try their line of chalk paint.
Here is a pic…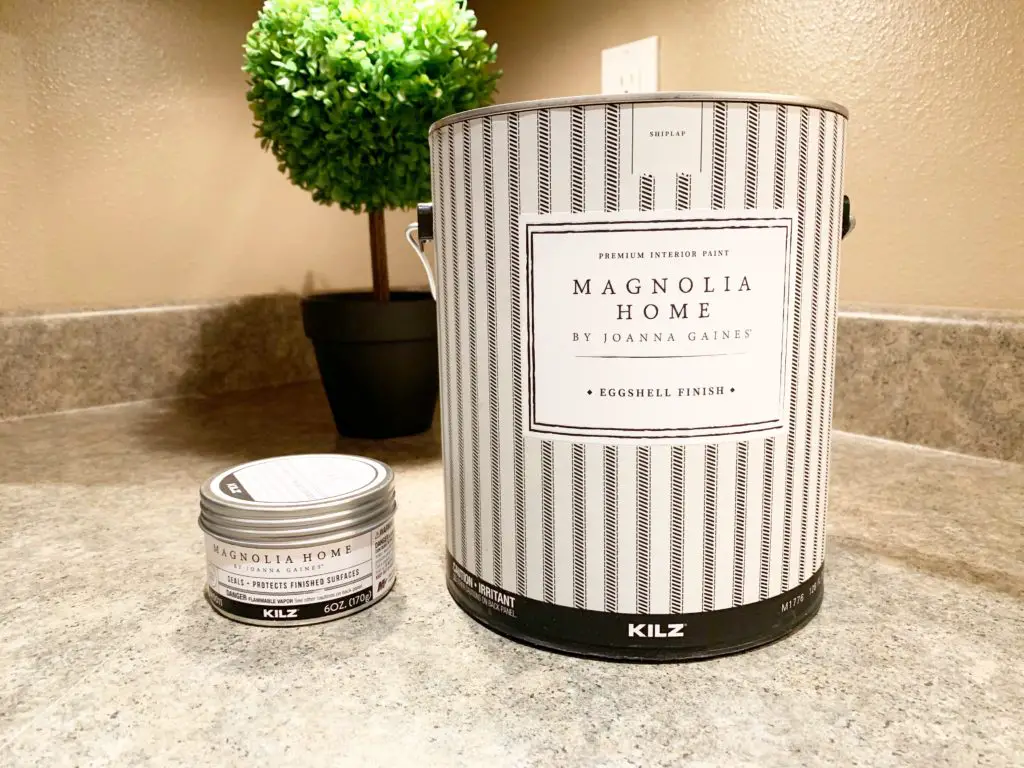
Like I predicted it was everything I thought it would be and it did not disappoint! I also picked up their wax, but I will talk about that later. This is just what I used, but if you have a favorite brand or type, I say go for it!
Now it’s time to paint! This part is pretty self explanatory, but I wanted to point out a few things I noticed. First, a little goes a long way so put your coats on lightly, there is no need to goop it on. Second, be careful around any cracks or corners not to let paint get caught or bunched up. This will not look good and you will end up redoing it. Third, chalk paint dries REALLY fast so make sure you are paying attention! This is also nice though because you do not have to wait long between coats.
For my projects I almost got away with only two coats of paint. I thought that was pretty impressive considering I was going from dark to white. I did however put a third coat on just to give it that final touch.
Step # 6 – Wax
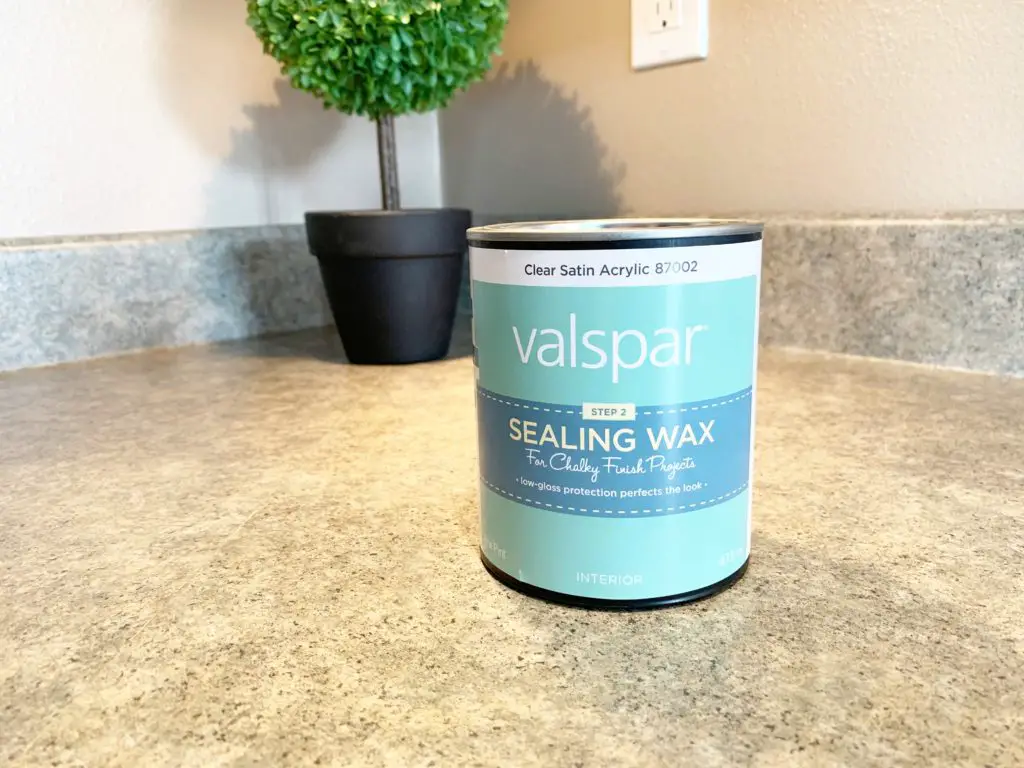
Now it’s time to wax! The wax is important because it helps to seal and protect your paint from any damage. I used two types of wax during this process. I liked them both. The magnolia brand took a little more time and was applied using a clean lint free cloth. I also found this wax from Valspar that I applied using a brush and seemed to go a little quicker! Make sure when you are waxing that your surface does not feel sticky or tacky. If so, you need to take a lint free cloth and wipe any excess off until it is smooth.
Step #7 – Tape & Hardware
The last and final step is to remove your tape and install your hardware. You might want to be a little careful and make sure your paint and wax is fully dry otherwise your paint might chip, but other than that you are DONE! Now you get to kick back and enjoy all your hard work! There is no better feeling!
I hope this has helped or inspired you in some way! Happy painting friends!
Love. Although I still want you to come help me. 🙂
BEAUTIFUL WORK! ♡
Its like you read my mind! You appear to know a lot about this, like you wrote the book in it or something. I think that you could do with some pics to drive the message home a bit, but other than that, this is excellent blog. An excellent read. I’ll certainly be back.
I LOOOOOOVE that little built in bookcase, it turned out amazing!!!!
All of your furniture pieces turned out WONDERFULLY!!!! And you are right, it really opened up your space! Well done!!!
This is exactly what I want- Thanks!!!
Do you need to sand anything?