*This post may have affiliate links, which means I may receive commissions if you choose to purchase through links I provide (at no extra cost to you). Thank you for supporting the work I put into this site!
When we moved into our house years ago, I knew right away I wanted to do something with our kitchen. It was dark, outdated, and after living there for only a handful of months I quickly realized that I hated the layout! If money wasn’t a thing I would have called a contractor, picked out all my favorites, and watched the magic happen.
In my world though, money is a thing. Although I would not label myself as poor, there is no money tree in my backyard. So naturally, I have learned to improvise with what I have!
This is not the first DIY project my husband and I have taken on, but let me tell you….. this is……THE BIGGEST!
Remodeling your kitchen can seem very overwhelming at first. I mean where do you even start?
What if you mess up?
Will you even like it? Or better yet, love it?
These are all very valid questions and ones that we asked ourselves A LOT before we even swung a hammer! However, if there is anything I have learned from all of our DIY projects over the years, it’s that sometimes you have to get out of your head, and just BEGIN!
Otherwise the fear of messing it up or not getting it right will leave you completely paralyzed! I would rather bump my head and make a few mistakes than to never do anything at all!
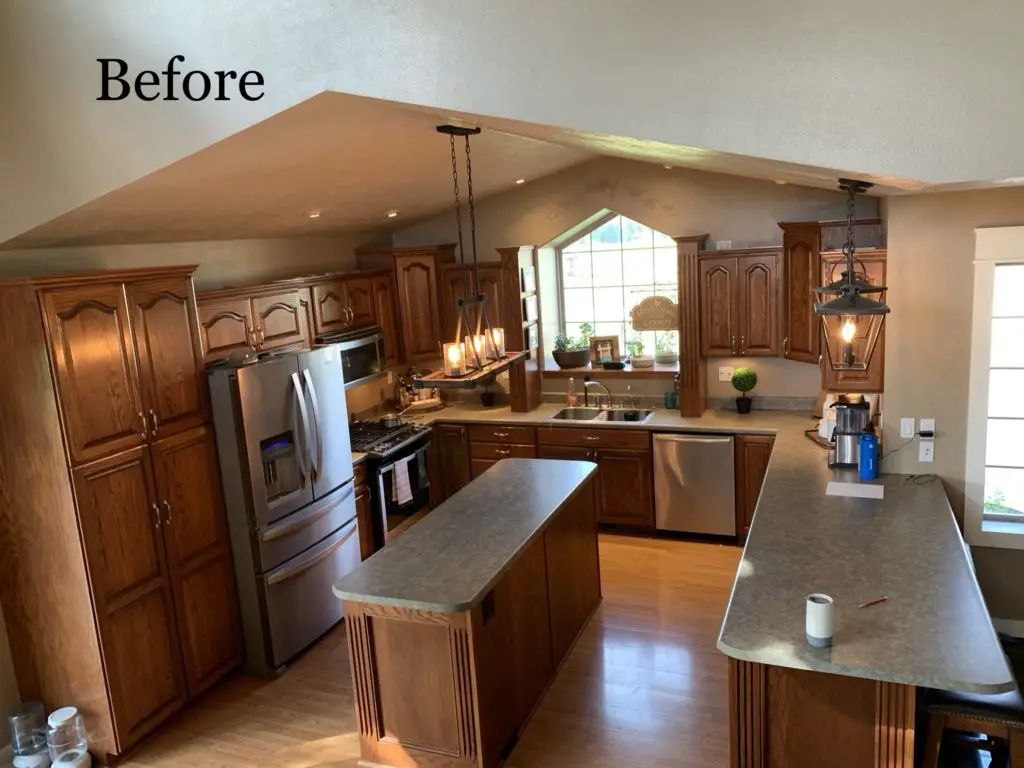
Now that we have all of that out of the way, I suppose I will show you what our kitchen looked like when we started this journey.
BEFORE….
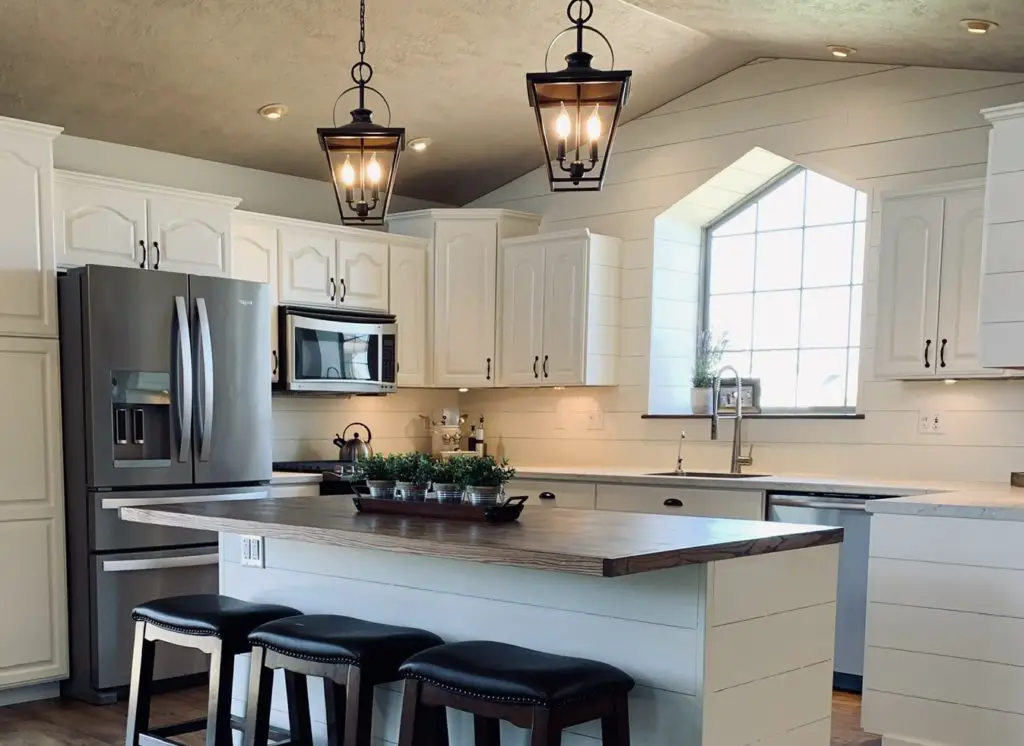
And AFTER……
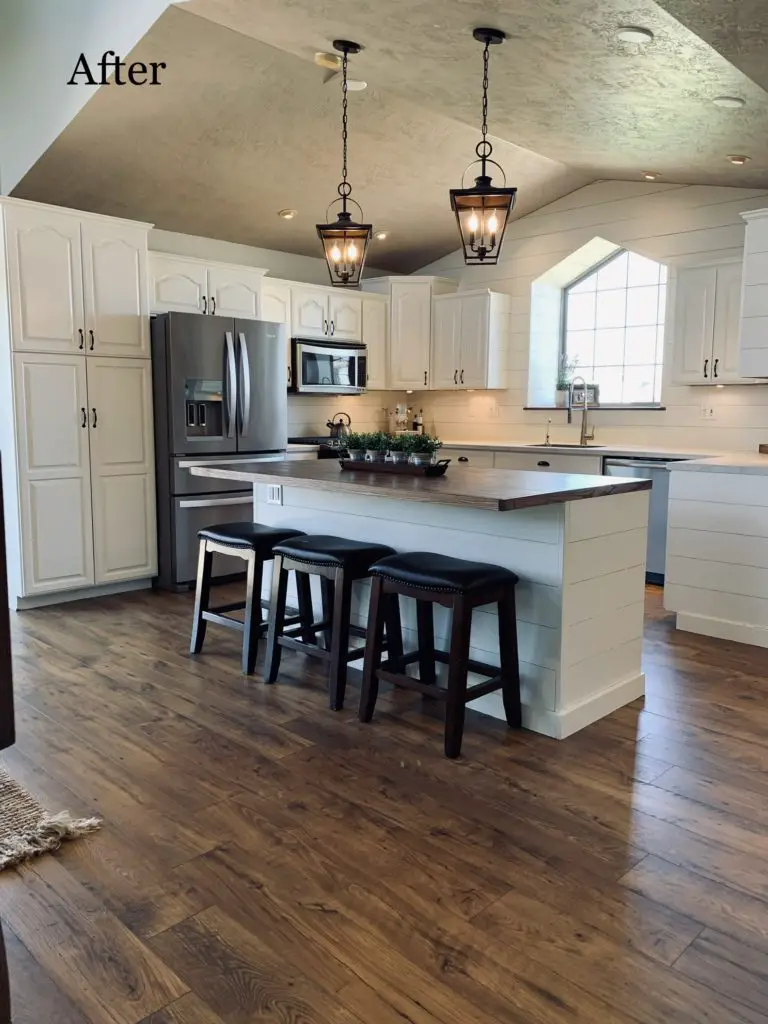
Everytime I look at these before and afters I am amazed at how different it looks! It turned out way better than I expected and I am absolutely in LOVE!
Here is what we did….
NEW LAYOUT
Shortly after moving in, I realized how much I hated this layout! I was constantly doing circles around either the island or the peninsula. Overall it just felt very choppy.
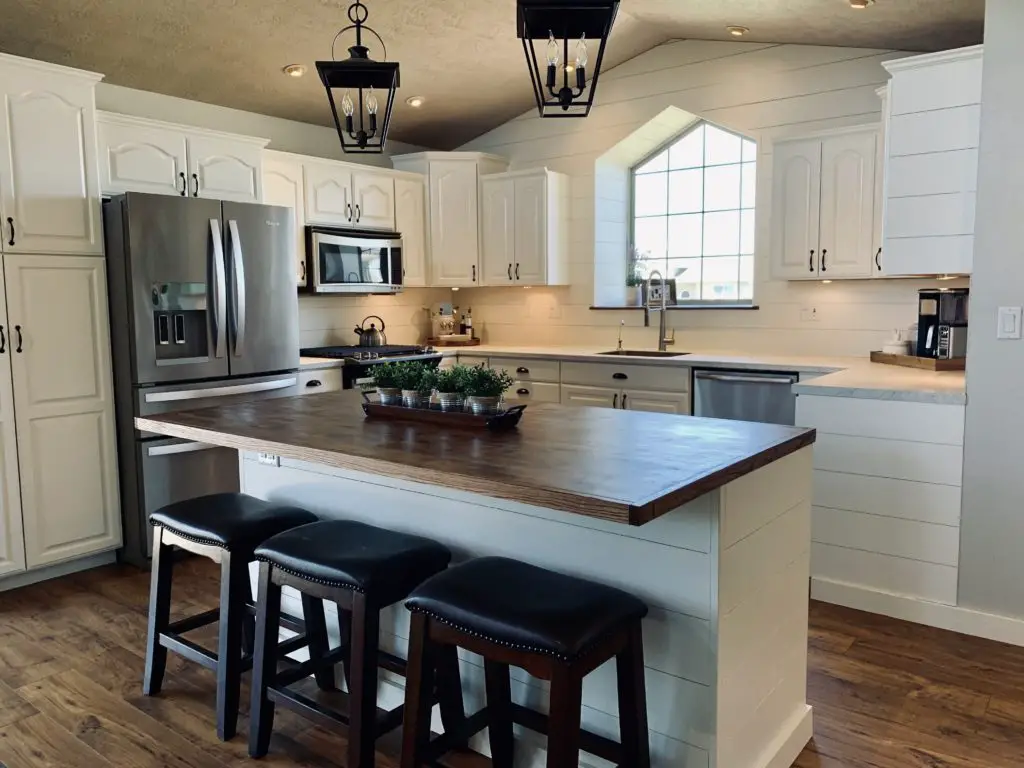
So naturally the first thing we did was remove both the island and the peninsula. Once the peninsula was gone we were able to turn the middle island sideways and free up a TON of space!
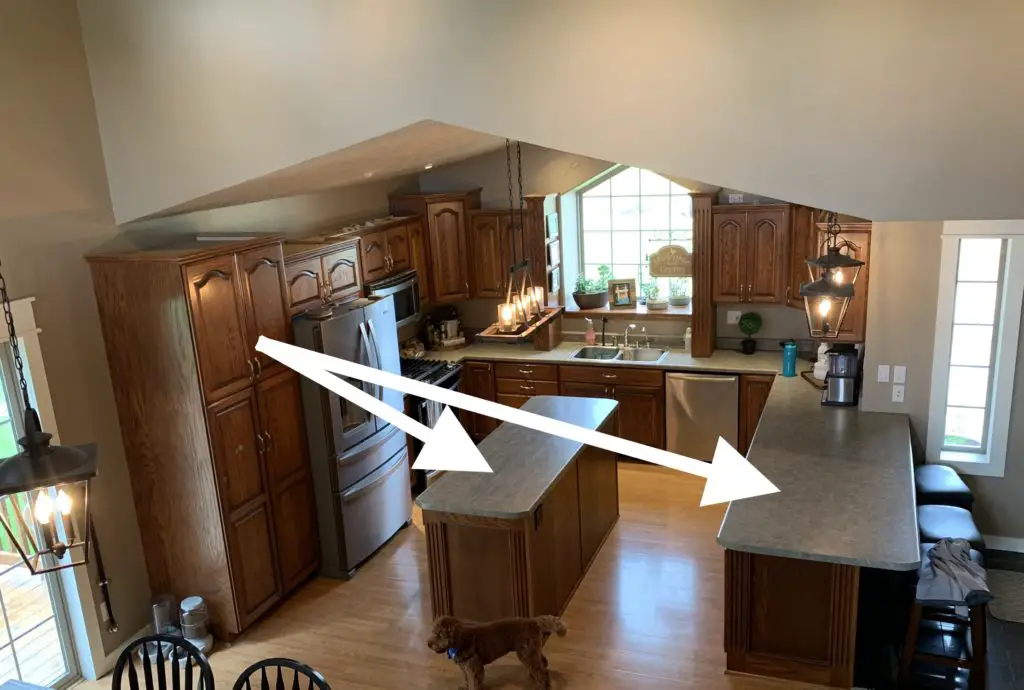
This made the flow of the kitchen SO much better! It also made it so that when we walk in from the front door we are not immediately bumping into and having to walk around the peninsula.
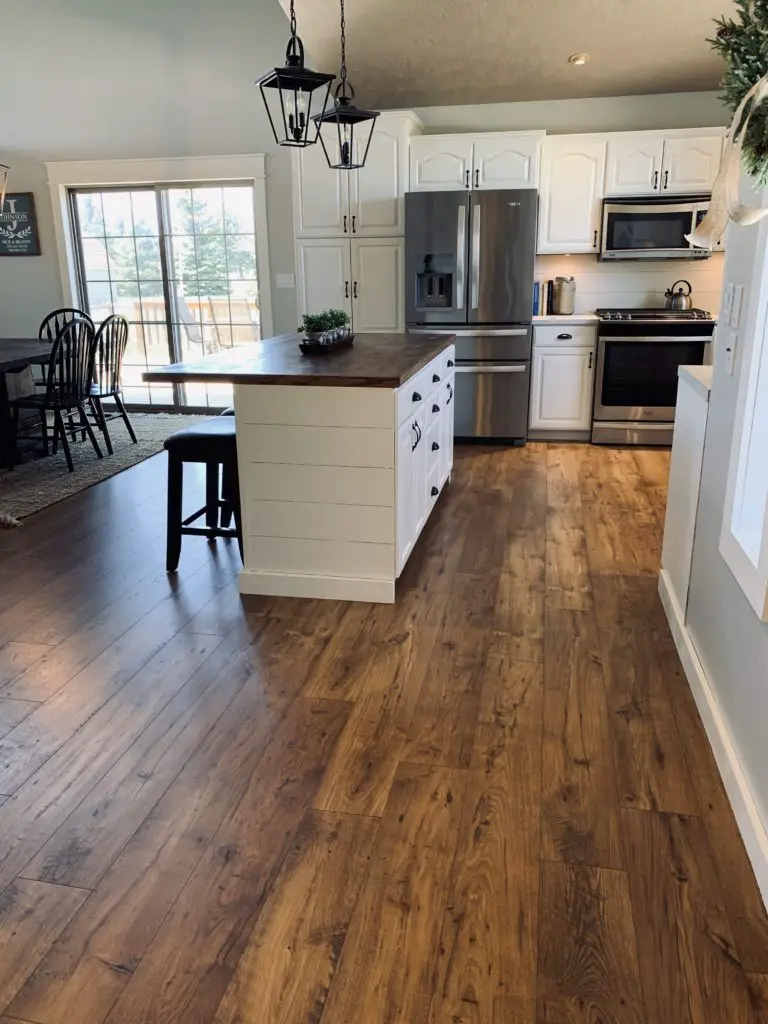
FLOORING
Of course when we removed the peninsula and the island we now had a flooring issue. Flooring is something that we put a decent amount of thought into. I knew that I did not want flooring that was too dark or too light. I also wanted flooring that did not easily show food and dirt but still had some texture and variance to it.
Installing flooring yourself can seem very intimidating, but don’t let that stop you! YouTube can be a wonderful resource for almost any DIY project! My husband installed & completed everything himself in less than two days.
CABINETS
One of the things I actually liked about our old kitchen was that the cabinets themselves were actually in pretty good shape. That was good because it was not in our budget to fully replace them. Which is why we decided to paint them! This was a bit more of an undertaking than what I initially planned, but was SO worth it in the end.
I plan to make an entirely separate post on what I did, how I did it, and what I used in a future post. So stay tuned!
COUNTERTOPS
If you know me very well, you probably now I am totally in love with anything farmhouse. Especially butcher block counters! I love the look and timeless beauty of wood. In fact, I highly considered doing ALL of our counters in butcher block. Although I have seen others do this with great success, butcher block does require some maintenance. It also made me a bit nervous to have my sink and exposed wood so close together.
In the end we decided to go with laminate around the perimeter and butcher block for the island. I think the two pair very nicely with each other.
We bought the butcher block at Lowes, and the laminate from a local place here in town called Creative Surfaces.
Here is a little secret for you though…
Did you know that a lot of these countertop stores have what they like to call a “bone pile?”
It is like the misfit toys but for countertops! Our particular counter was a previous mis-measurement from a previous customers order and so it was just sitting in the back. Waiting for the right home. At a fraction of the cost of new.
If you are looking for a steal of a deal? You should really consider calling around to see if your store has a “bone pile.” You never know what you may find!
LIGHTING
Lighting was something that we did almost immediately after initially moving in. If only I had some good before pics of the green spaceship lights we used to have! Oh the memories!
Other than hiring an electrician to move everything around, we got lucky and ended up using the same lights we had over our peninsula over our island. Lighting can get expensive real quick, so I am glad we were able to recycle a bit here!
BACKSPLASH
If you look close in the before pictures you will see to giant columns on each side of the sink and some engraved flower type things above the sink. I am sure that engraved plaster flowers and columns that took up tons of counter space used to be all the rage, but their time in this house was over! So after lots of debate and options to choose from, we decided it was best to shiplap right over all that craziness! If you missed that DIY post, you can find it HERE!
This was much less expensive than doing tile, and much easier to install. It brightened the entire space so much! It was the finishing touch that I was looking for and I wouldn’t have changed a thing!
If kitchen remodeling has been on your list of to-do’s, than I hope this post has inspired you! Stay tuned for more detailed posts on how we did everthing!
If you want to be sure not to miss it, please subscribe!
Beautiful makeover. Can you tell me what kind of floors did you put down?
Thanks Tracy! Our flooring is Mohawk and the name is Cedar Chesnut.